今天看了看Jlink v10,最便宜的也得400块,太贵了,但是要调试程序,只有选择printf来实现了,所以先把printf来实现。
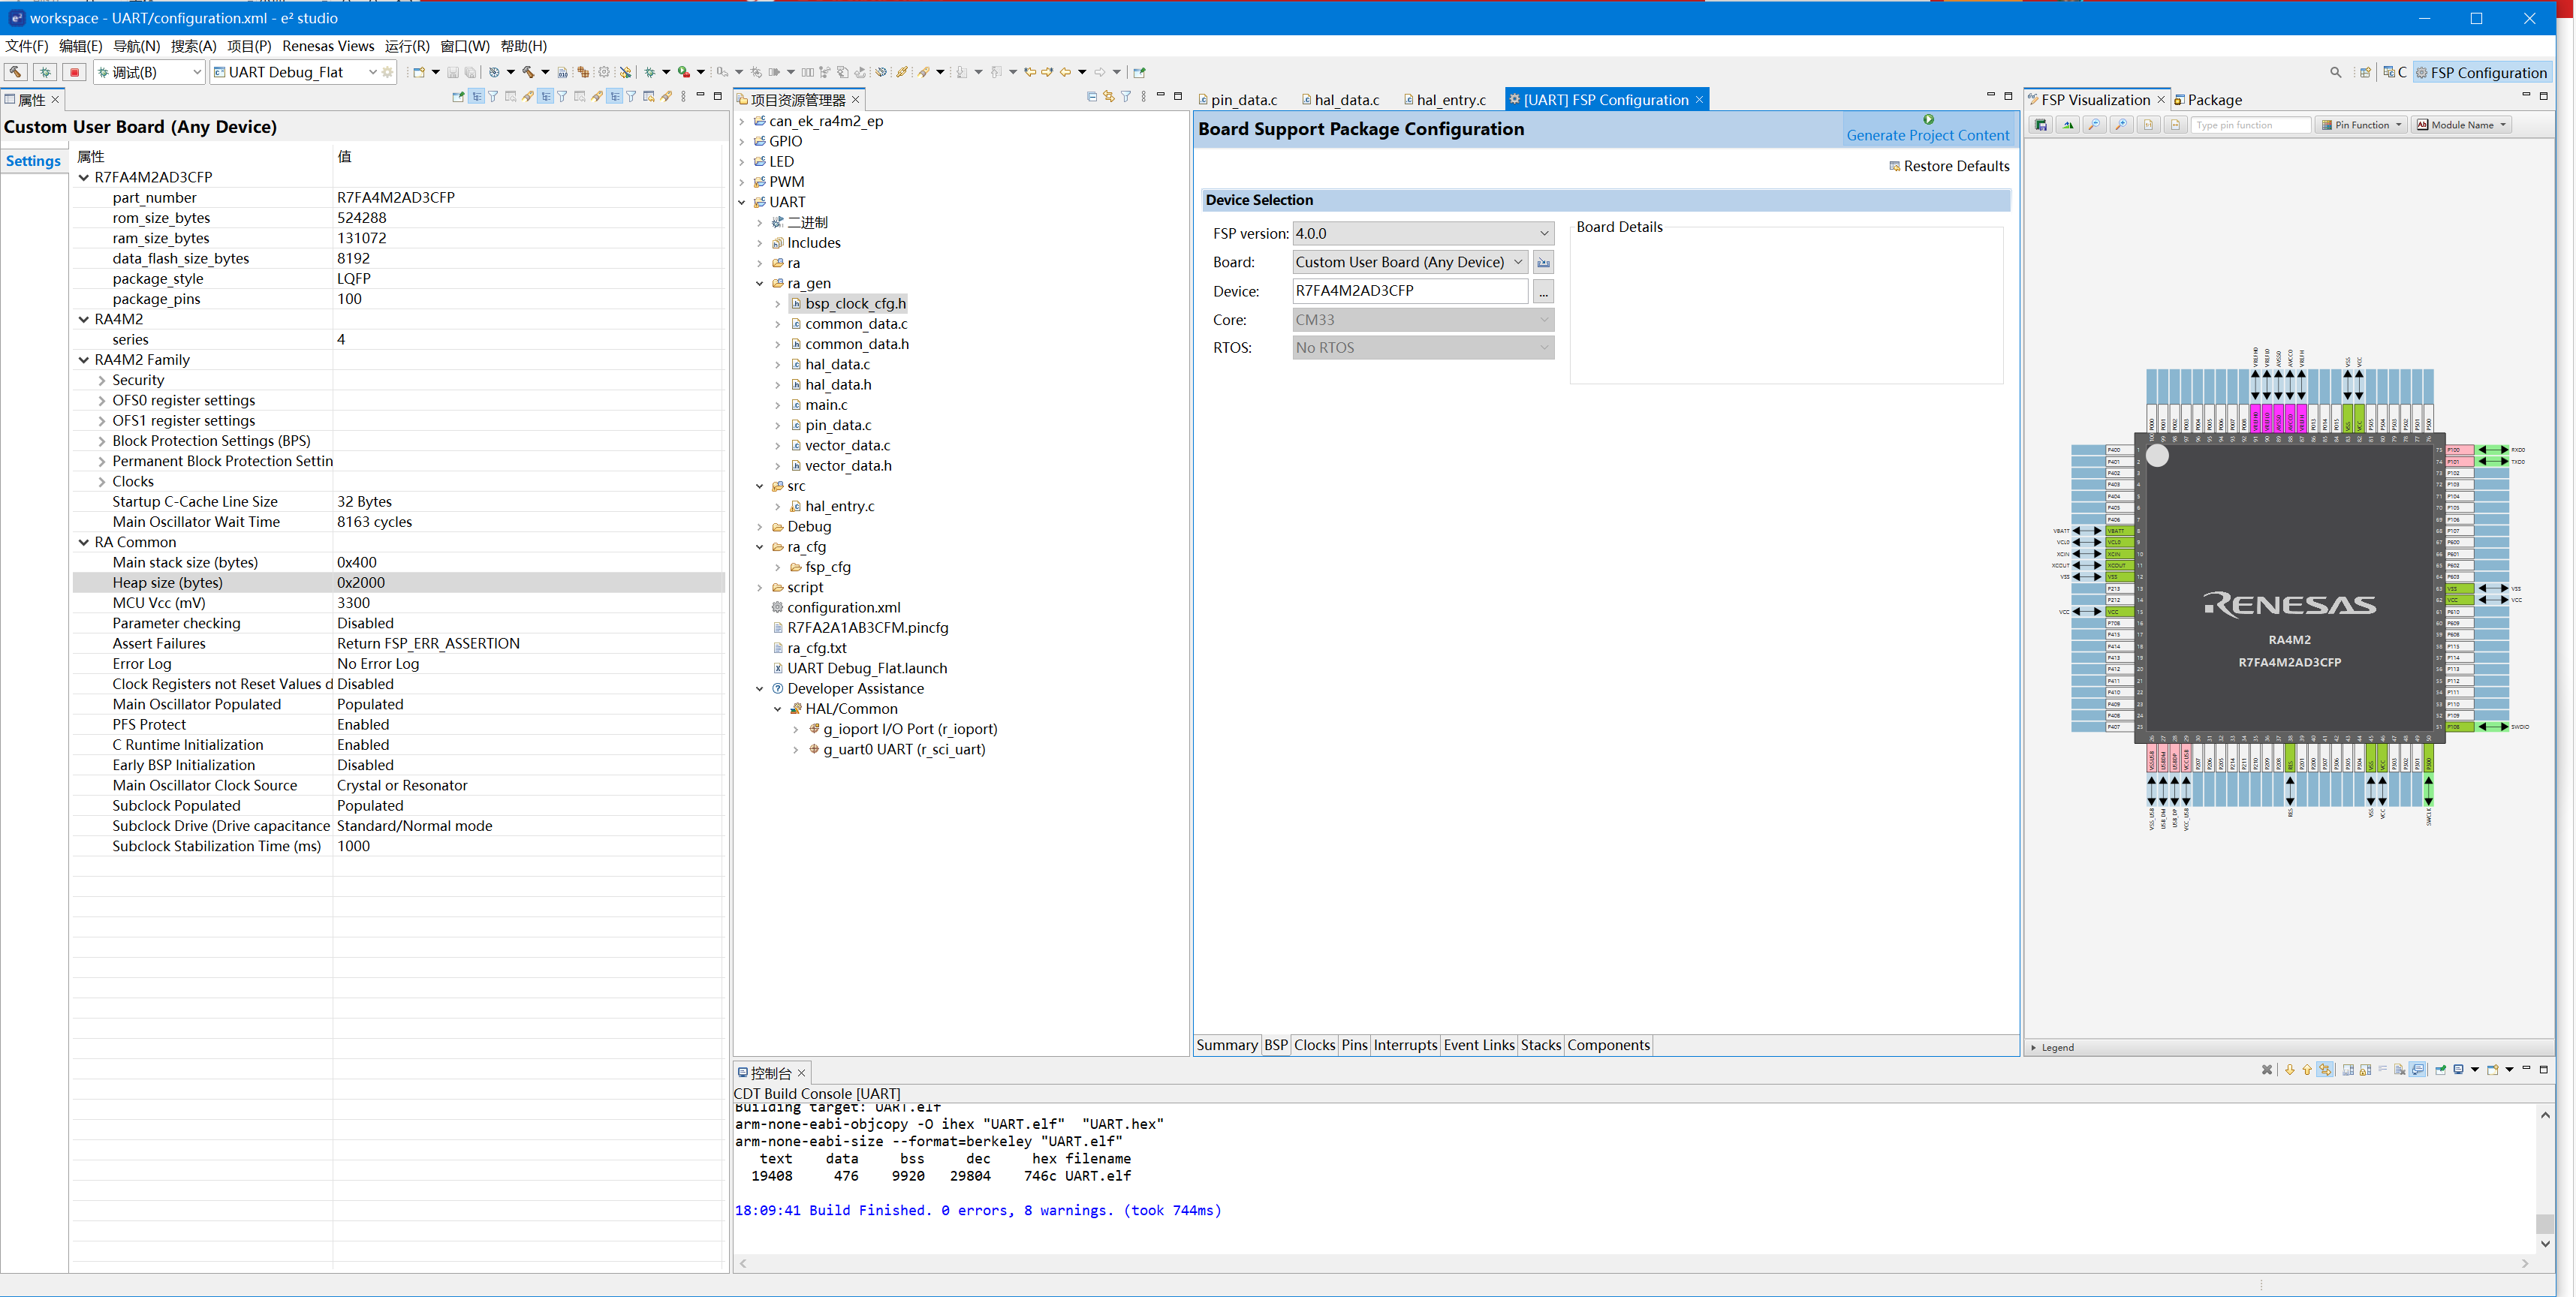
1、按照常规的新建好工程:
 2、打开资料《RA2E1/RA2L1入门指南》的《# 瑞萨e2studio----打印函数(printf、sprintf)的实现》这篇文章,他们的芯片型号不一样,但是操作也是基本相同的。
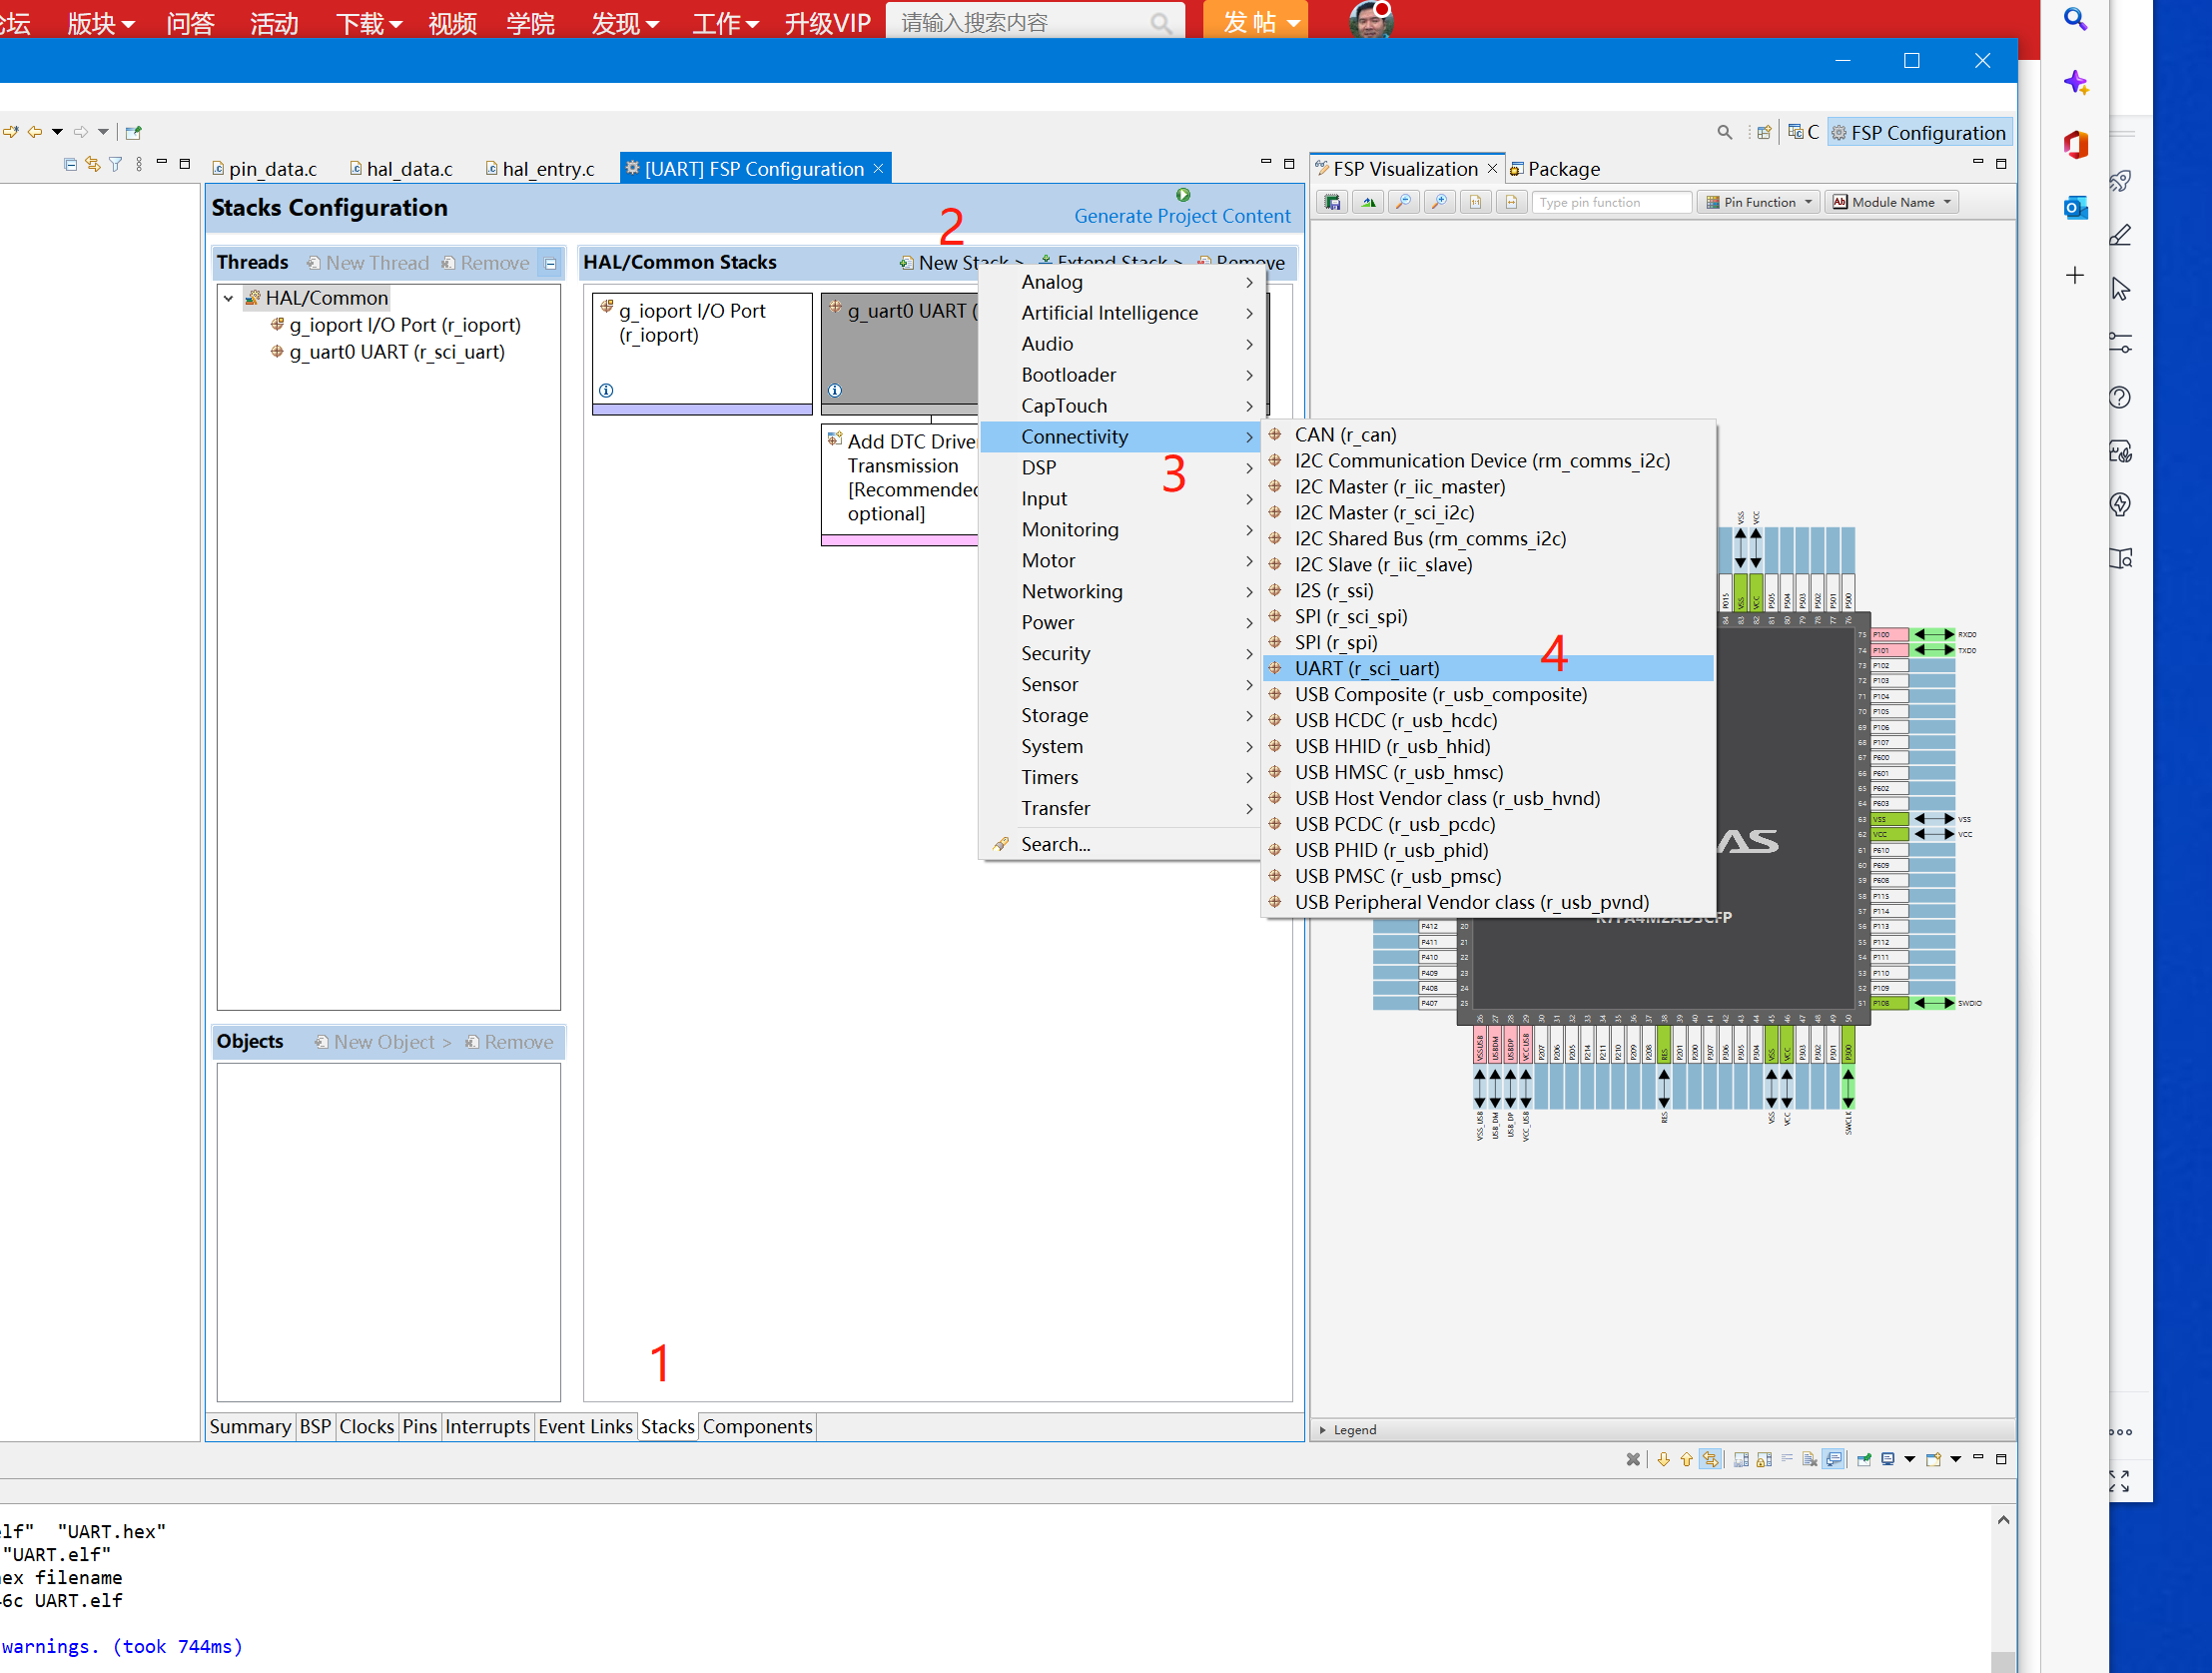
3、按照以后步步骤添加uart0:

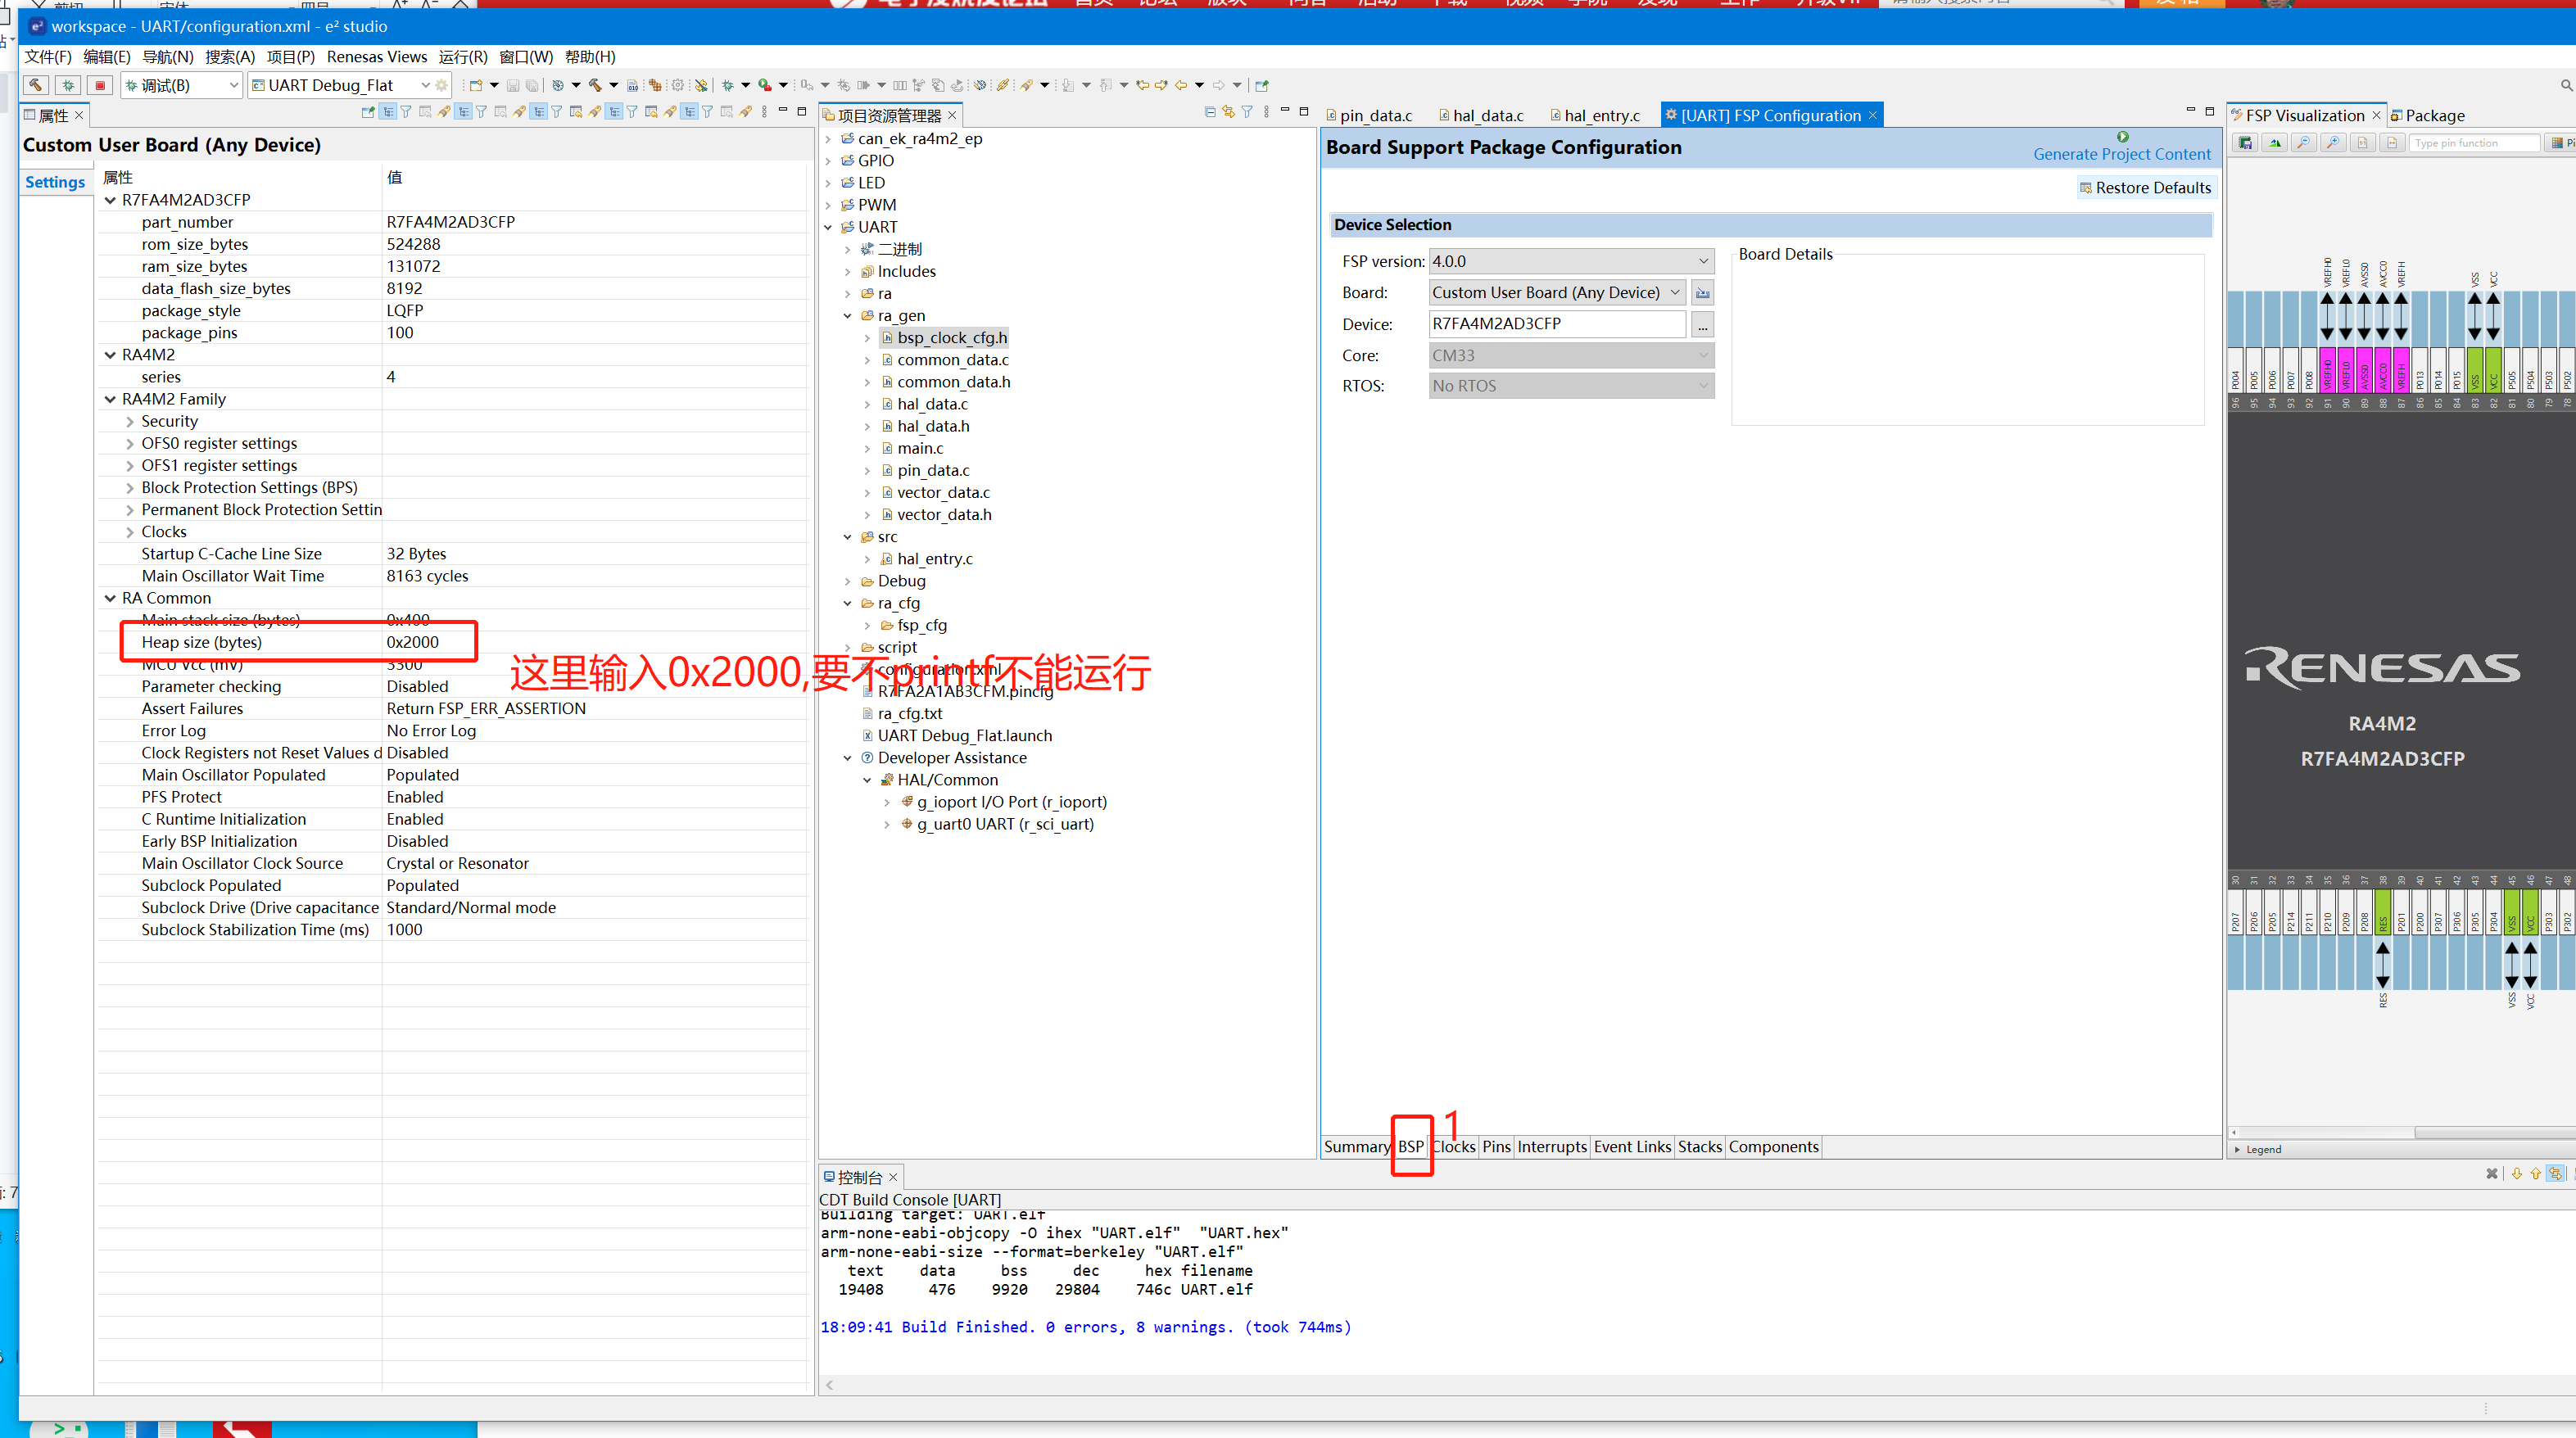
4、选好IO为P101、P100为RX、TX 5、设置E2STUDIO堆栈

6、修改e2studio的重定向printf设置C++ 构建->设置->GNU ARM Cross C Linker->Miscellaneous去掉Other linker flags中的 “--specs=rdimon.specs” 7、完整的halt_entry.c内容如下: #include "hal_data.h"#include <stdio.h>FSP_CPP_HEADERvoid R_BSP_WarmStart(bsp_warm_start_event_t event);FSP_CPP_FOOTERfsp_err_t err = FSP_SUCCESS;unsigned char send_buff[100];volatile bool uart_send_complete_flag = false;void user_uart_callback (uart_callback_args_t * p_args){ if(p_args->event == UART_EVENT_TX_COMPLETE) { uart_send_complete_flag = true; }}#ifdef __GNUC__ //串口重定向#define PUTCHAR_PROTOTYPE int __io_putchar(int ch)#else#define PUTCHAR_PROTOTYPE int fputc(int ch, FILE *f)#endifPUTCHAR_PROTOTYPE{ err = R_SCI_UART_Write(&g_uart0_ctrl, (uint8_t *)&ch, 1); if(FSP_SUCCESS != err) __BKPT(); while(uart_send_complete_flag == false){} uart_send_complete_flag = false; return ch;}int _write(int fd,char *pBuffer,int size){ for(int i=0;i<size;i++) { __io_putchar(*pBuffer++); } return size;}/*******************************************************************************************************************//** * main() is generated by the RA Configuration editor and is used to generate threads if an RTOS is used. This function * is called by main() when no RTOS is used. **********************************************************************************************************************/void hal_entry(void){ /* TODO: add your own code here */ err = R_SCI_UART_Open(&g_uart0_ctrl, &g_uart0_cfg); assert(FSP_SUCCESS == err); unsigned char buff[]="RA E2STUDIO"; uint8_t buff_len = strlen(buff); err = R_SCI_UART_Write(&g_uart0_ctrl, buff, buff_len); if(FSP_SUCCESS != err) __BKPT(); while(uart_send_complete_flag == false){} uart_send_complete_flag = false; sprintf(send_buff, "\nHello World!.\n"); uint8_t len = strlen(send_buff); err = R_SCI_UART_Write(&g_uart0_ctrl, send_buff, len); if(FSP_SUCCESS != err) __BKPT(); while(uart_send_complete_flag == false){} uart_send_complete_flag = false; memset(send_buff, '\0', sizeof(100)); int int_i=55; float float_i=66.20f; char char_i[]="hello e2studio"; while(1) { printf("int_i=%d\n",int_i); printf("float_i=%.2f\n",float_i); printf("char_i='%s'\n",char_i); R_BSP_SoftwareDelay(1000, BSP_DELAY_UNITS_MILLISECONDS); // NOLINT100->160 }#if BSP_TZ_SECURE_BUILD /* Enter non-secure code */ R_BSP_NonSecureEnter();#endif}/*******************************************************************************************************************//** * This function is called at various points during the startup process. This implementation uses the event that is * called right before main() to set up the pins. * * @param[in] event Where at in the start up process the code is currently at **********************************************************************************************************************/void R_BSP_WarmStart(bsp_warm_start_event_t event){ if (BSP_WARM_START_RESET == event) {#if BSP_FEATURE_FLASH_LP_VERSION != 0 /* Enable reading from data flash. */ R_FACI_LP->DFLCTL = 1U; /* Would normally have to wait tDSTOP(6us) for data flash recovery. Placing the enable here, before clock and * C runtime initialization, should negate the need for a delay since the initialization will typically take more than 6us. */#endif } if (BSP_WARM_START_POST_C == event) { /* C runtime environment and system clocks are setup. */ /* Configure pins. */ R_IOPORT_Open (&g_ioport_ctrl, g_ioport.p_cfg); }}#if BSP_TZ_SECURE_BUILDBSP_CMSE_NONSECURE_ENTRY void template_nonsecure_callable ();/* Trustzone Secure Projects require at least one nonsecure callable function in order to build (Remove this if it is not required to build). */BSP_CMSE_NONSECURE_ENTRY void template_nonsecure_callable (){}#endif8、编译后烧录到开发板:USB转TTL接到P100、P101上,打开串口助手,就可以收到开发板发出来的信息了: 【总结】根据教程一步一步就可以实现配置uart0,非常简单。
|